Vim is a powerful editor. But like many powerful things, sometimes it can be used in less-than-powerful ways. One of those weaker ways is to only edit one file at a time, bouncing back and forth between editor and the shell or file explorer. Vim can easily handle multiple files at the same time, and this post will show you some of the built-in commands that are available to help out.
Editing multiple files simultaneously has many benefits.
First, it dispenses with the overhead of startup time and finding the right place in the file. This usually isn’t a lot of time, but it can add up as you flip between different files.
The second benefit has to do with the locality and impact of your edits. When you start a task that involves editing a single file, it’s likely that you will need to edit other files as well. They could be a reference, or a place to copy information from. When working in software, it’s common to move lines of code between files when doing a refactor. Non software tasks benefit from this as well. For instance, when editing a file in /etc/cron.d/, it might be useful to check a neighboring file to see how its cron expression is constructed. The point is that rarely do files truly stand alone.
A third benefit is that once you have the three or four (or twenty) files open, you can leverage Vim’s built-in session saving ability to take that entire set up and save it for later. This is particularly useful when switching between tasks in a software project. You can save the editing session for one branch while that code is in review, and start an entirely different task with its own constellation of files. Then, when you need to make changes in response to the review, you can load up the previous session and get right back to where you were.
There are other benefits as you progress further down the road, but these are a good place to start.
Structure
This post is written so that you can stop at any time. You do not need to read and implement the entire content in order to receive any benefit. On the contrary, the best way to incorporate these (or any tutorial/learning tasks) is to take an incremental approach. Choose a small amount of information or technique that you can integrate into your workflow, and then use it for a while. Once it has become integrated, move on to the next section and integrate again.
Don’t be frustrated when this information feels like it slows you down. Remember the phrase “Slow is smooth, and smooth is fast”. Adding a second file to your current Vim session will be slower than quitting your existing session, but overall your productivity will increase. Take your time and do the motions correctly. As your muscle memory grows, you will be able to add more files so quickly that you will outpace any former technique.
Preparation
To give you a known playground, I’ve prepared a git repository, that you can get one of two ways:
Clone it:
$ git clone https://github.com/justone/2018-one-vim-playground.gitDownload it:
$ curl -L https://github.com/justone/2018-one-vim-playground/archive/master.tar.gz | tar -xzvf -
Either way, you should have a directory in which to try out the following.
From one to more
The first step is opening just one more file. First, open a single file in Vim (vim file1), and then run the following:
Open a second file in a horizontal split:
:split file2Open a third file in a vertical split:
:vsplit file3Save our state with:
:mksession! session.vim
The :mksession! command saved the state of your windows (and many other things) into a file, so you can always return to the layout you have now by quitting vim and running vim -S session.vim (or running :bufdo bdelete | source session.vim to reuse your current vim instance).
Your Vim session should now look like this:
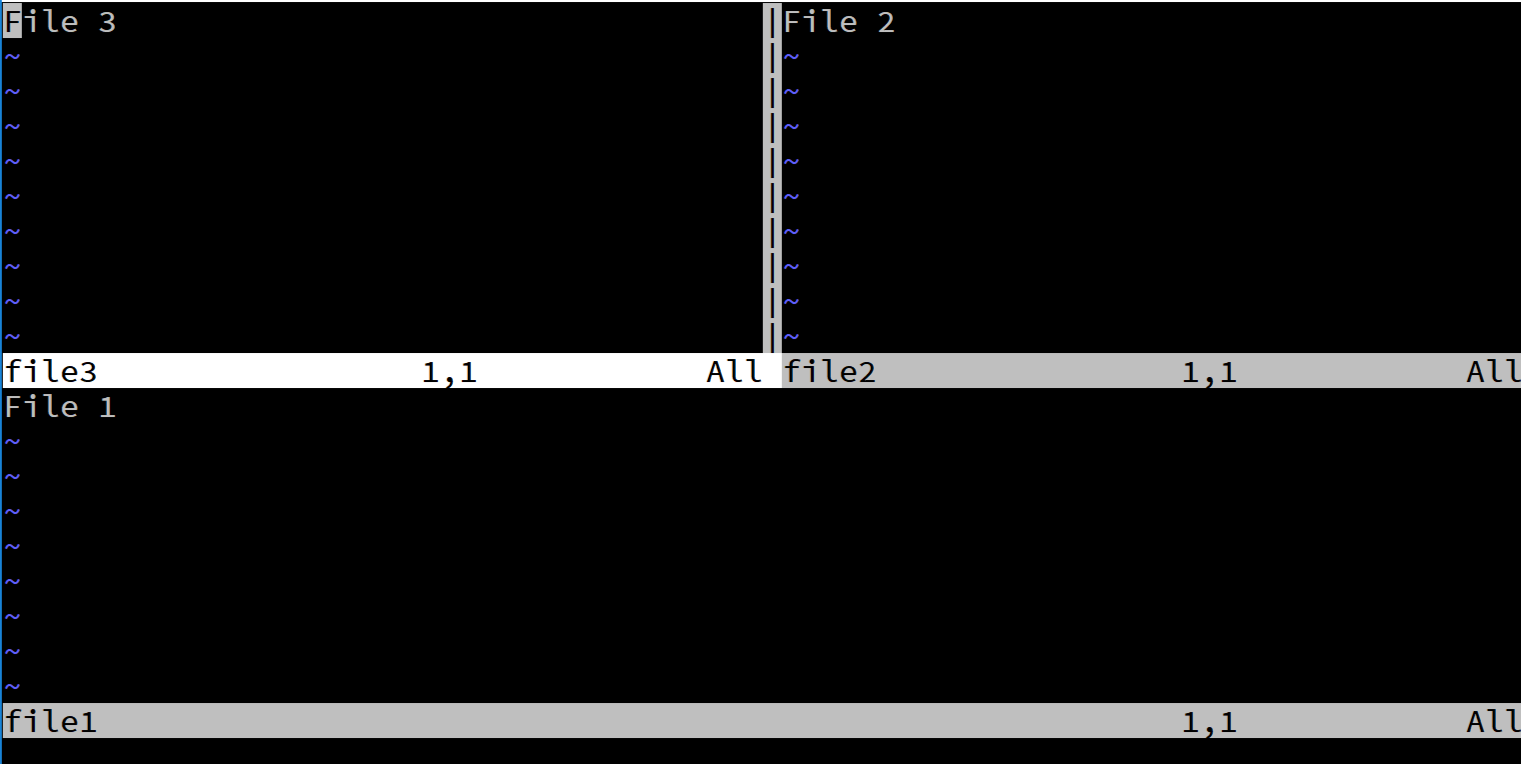
Now that we have multiple files open, the next task is navigation. Vim helpfully supplies the following:
| Command | Description |
|---|---|
| CTRL-W h | Move to the left |
| CTRL-W l | Move to the right |
| CTRL-W j | Move below |
| CTRL-W k | Move above |
These map directly to the standard movement keys, and have similar effect. Experiment by moving around into each buffer.
Next up is moving windows around. The most common way to move windows around is with one of these commands:
| Command | Description |
|---|---|
| C-w H | Move all the way to the left, full height |
| C-w L | Move all the way to the right, full height |
| C-w J | Move all the way down, full width |
| C-w K | Move all the way up, full width |
Try moving each command in each buffer to get used to what it does to the layout. Try to move buffers around and then move them back to their original configuration. At any point in time, you can reset to get back to the original layout using the commands from the previous section.
Further reading in the Vim documentation: * :help opening-window * :help window-move-cursor * :help window-moving
Tab pages
Tabs in Vim are a great way to group together associated buffers. For instance, one tab page for database code, one for the web routes, and another for the frontend code.
Take the three window session from above (vim -S session.vim) and run:
Open a fourth file in a new tab page:
:tabe file4Go back to the previous tab page:
gTPush a file to a new tab page:
CTRL-w T
Editing neighbors
Many times it is useful to open files that are nearby the current file, since many times like files are grouped together in the same directory.
The best way to accomplish this is to use a set of mappings from this episode of vimcasts. To load these up, load the nearby.vim file into your session by running :source nearby.vim.
Then, in the root of the playground repository, run vim and:
Open a fifth file in a new tab:
:edit deep/file/path/file5Bring up an edit prompt for nearby files by pressing
,es.Enter
file6and the new file will be opened in a horizontal split.
Experiment with the other “nearby” mappings by using ,ew, ,ev, and ,et to open files.
The nearby mappings utilize a few advanced Vim features: * :help expand() * :help c_CTRL-R_=
Cleanup
Up until this point, everything has been about adding more buffers to your session. If you simply run :q in any open buffer, only the window is removed. The buffer remains in memory. Most of the time, this is ok, but for very long running sessions with many (or large) files, buffer management is key. The best way to remove a buffer from your session is via the :bd command.
Take the session from above (vim -S session.vim) and run:
List the loaded buffers:
:lsDelete a buffer:
:bd file1or:
:bdList buffers again to verify that the buffer is gone:
:ls
Helpful plugins
I’ve come across many plugins over the years that have helped me in managing my buffers. Here are a few:
- bufexplorer - This will help with listing, opening, and removing buffers.
- bufkill - This provides a
:BDcommand that will do the same thing:bddoes, but retain your window layout. - ctrlp - This helps find files using fuzzy matching. Its most-recently-used functionality is particularly useful.
- obsession - This extends the built-in session handling to continually update the session file as you edit.
Conclusion
I hope this guide has been helpful. There are many other plugins and mappings that can help, but getting the built-in basics down will get you quite far.
Enjoy.